Simple Guide To Webcam Testing
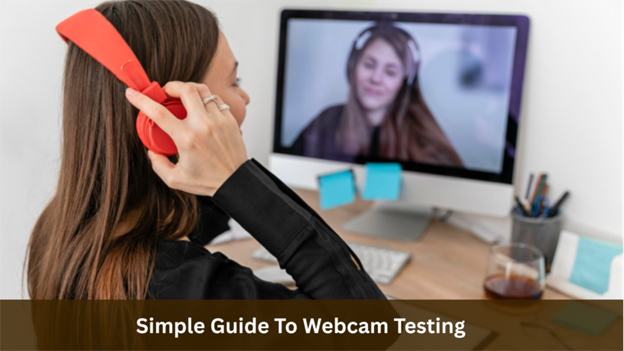
You might have gone through that frustrating experience when you are starting a video call, and your webcam suddenly stops working. In some cases, the screen goes black, the image looks blurry, or the camera is not detected at all.
These problems usually occur at the worst possible time, like during an online meeting, interview, or presentation. Consequently, it may easily become a stressful and distracting situation.
Luckily, such issues can be avoided by testing your webcam first. A test check enables you to ensure that your camera is functioning well and the video quality is suitable for calls or recordings.
Moreover, with the help of modern browser tools, this process is easy and quick without any software installations needed. This article describes the process of webcam testing step-by-step and identifies realistic methods to ensure your camera works reliably.
1. Preparing For a Webcam Test

It is necessary to prepare your setting and equipment before initiating a webcam test. The first step is to connect the camera and make sure it is successfully identified by your computer.
Ensure that there is adequate lighting and that it is placed in such a way that your face can be seen. Then you need to change the camera angle to achieve the intended frame, with the background being clear.
When you have your setup ready, you can begin the test to check image clarity, focus, and smoothness of motions. Finding a solution based on careful preparation will make the test results accurate and meaningful.
2. Camera Access Setup in Browser
Ensure your browser has permission to access the camera before any test of a webcam can be initiated. Current browsers have built-in security features that prompt the user to allow webcam access.
Once you begin the test, there will be a pop-up message that asks whether the site can access your camera. When you press the button “Allow,” you get temporary access in order to see the webcam feed on your screen. Failure to obtain permission will stop the test since the browser blocks the camera.
Unless the prompt appears, you may have to check the camera permissions in your browser settings. After the access is granted, the webcam is expected to start immediately and show the video preview.
3. Camera Selection and Device Detection

Most computers nowadays support multiple cameras. For example, a laptop can have an in-built camera, but an additional USB web camera can be connected simultaneously.
A webcam testing tool normally identifies all the available cameras automatically. After starting the test, choose one of them in the dropdown list. This is to make sure that the right camera is on and is useful in changing devices or troubleshooting hardware.
Selecting a camera ensures the correct device is active. It can also assist in checking whether the camera hardware is being recognized by the system.
4. Video Quality and Performance Check
Testing is not just about ensuring that the camera switches on. It enables you to check the quality of the video feed as well.
When the webcam preview is displayed, be careful to note crucial factors such as clarity, brightness, and smoothness of movement. Numerous testing tools allow additional details such as resolution, frame rate, and brightness indicators.
Such measurements help to determine whether the camera is good enough to use during meetings, streaming, or recording. In case the picture is low-quality or dark, you can change the room lighting or camera angles and achieve the desired outcome instantly.
5. Screenshot and Feature Testing

Most webcam testing software contains extra features that assist you in discovering the functions of the camera. To illustrate, there exist numerous tools that enable the user to take screenshots during the test.
By taking snapshots, you have the opportunity to take a closer look at the image quality. You also have the option to find out whether the colors are natural or if the camera is sufficient in capturing details.
Certain platforms even have grid overlays, zoom, or filter features. Function testing of these features can be used to ensure the camera functions well in various scenarios.
6. Privacy and Local Processing Protection
Privacy remains a major concern when using webcam tools online. Many people hesitate to activate their camera because they worry that video footage might be recorded, stored, or shared without their knowledge. These concerns are understandable, especially when the camera is connected to the internet.
Modern browser-based webcam testing tools address this issue by processing video directly on the user’s device. Instead of sending the camera feed to external servers, the preview remains within the browser during the test.
This local processing approach allows users to check camera functionality while maintaining control over personal data. Since the video is not uploaded, the testing process remains simple and secure.
As a result, users can evaluate camera performance without worrying about recordings being stored online or used elsewhere.
Conclusion
Webcam testing plays an important role in maintaining smooth communication during video calls, online classes, and virtual meetings. By testing the camera beforehand, you can quickly confirm that it functions correctly and that the video quality meets your expectations.
In addition, simple browser tools allow you to review resolution, brightness, and frame performance in just a few seconds. This small step helps prevent unexpected technical problems when conversations or presentations begin.
It also gives you the opportunity to adjust lighting, camera position, and device selection before going live. With a quick and consistent testing routine, you can approach every video interaction with greater confidence and reliability.

